First coat

In the last episode, I had discovered that after all the sanding back and painting I actually needed to fill the crack. I also discovered that the paint takes a lot longer to actually dry that I thought.

The end result was that I was now at the point of having patched the crack whether to paint over it before taking the car out for the weekend, or doing the sanding and painting of the epoxy after the drive, even though the car would be dirty.

I ultimately decided that there was no need to rush (which took a lot of discipline on my part) and that I would wait until after the weekend run. So on Sunday night, after the trip out in the morning, I broke out the 600 grit sand paper and commenced what I thought would be short process.

The reality was that I probably needed coarser sand paper to cut through the epoxy, because the 600 grit got clogged pretty quickly. Not having any coarser sand paper I continued on for well over an hour sanding, sanding, sanding and sanding some more.

To be honest, it got the better of me and I was now so sick of sanding that I just wanted it done. I tided it all up and then applied the first coat of paint over the patched crack.

WP_20140615_005

The above result at the end of the painting process certainly looks much better but if you look closer you can see that the surface is not completely flat. The ‘scar’ where the epoxy is can be seen upon close inspection.

To get a totally smooth result I probably should have used a machine sander, however the risk with that is that if you sand away too much then that is generally more of a problem than not enough. Thus, I decided that given all the constraints it was the best I could do.

I left the paint to dry for another week and took the car out for a long drive with the Ferrari Club on Sunday.

WP_20140526_005

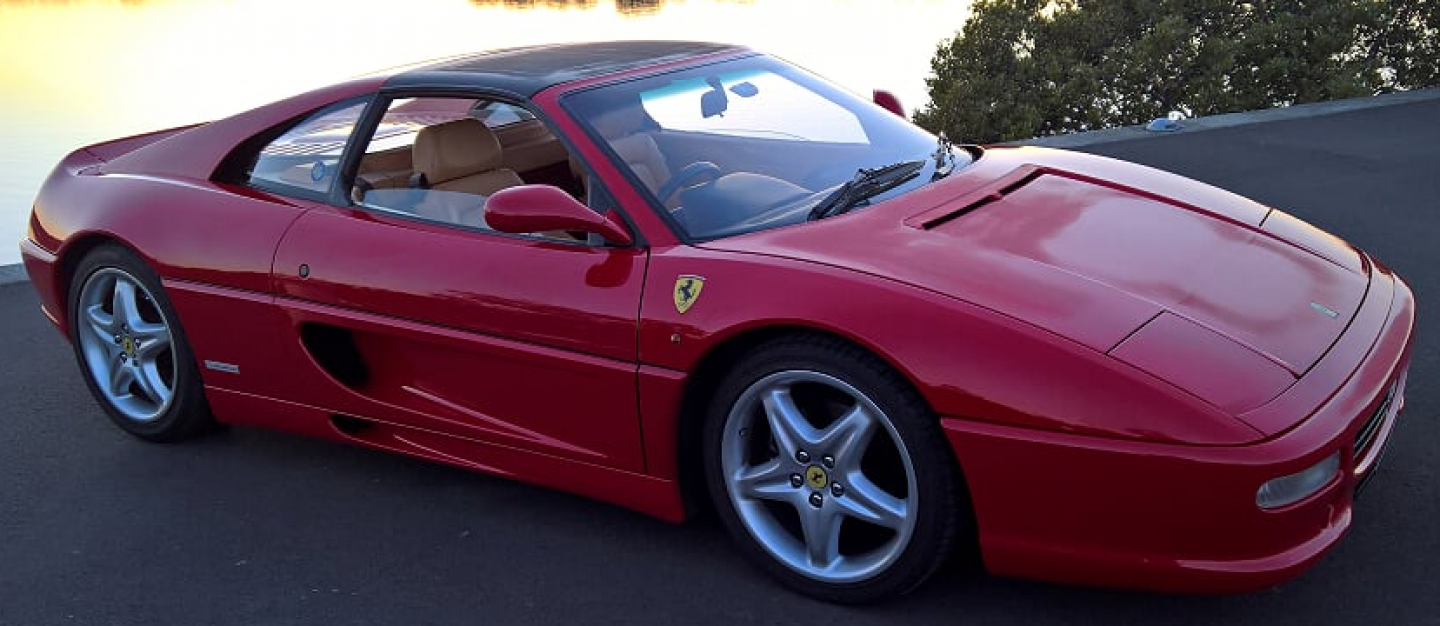
So if the above is what it started out as, this is what it looks like now.

WP_20140622_005

If you look closely you can see the area that I have painted and the ‘epoxy scar’ that perhaps could be sanded back more but generally at this stage of the game i am pretty happy with the result as I no longer see white fibreglass poking through red paint work.

With the weekend drive over it was now time to put a second coat over the first. I had been advised that I should sand the first attempt with 1200 grit to ensure there are no imperfections that would show through the second coat.

I would need to clean the area before painting so I asked someone whether methylated sprits could be used. They advise that I should use polish first then use metho. In the end I decided to wash the area first with car detergent. I then rinsed and dried the area. I then applied some of the cutting polish that came with the paint repair kit I had purchased.

The cutting polish took some of the paint off onto the polishing rag. I panicked at first but then remembered that that this is what the polish is supposed to do and the paint I was cleaning had no clear coat on it yet so it was raw paint.

I got an even greater shock when I then tried to use metho, because it started to take the paint off in much greater volumes. This left part of the surface I had attempted to clean sticky, like the paint wasn’t dry. Cursing my luck I now had to decide whether to proceed with the sanding and second coat.

Impatience won out and I decided to proceed with the second coat. I therefore cleaned the area again with water to remove any metho. Once it was dry I then proceeded to lightly sand the whole area back with 1200 grit.

Doing so took the gloss off the surface and did expose some of the white areas previously sanded. This was probably more to do with applying the metho than the sanding.

With the area sanded back, I once again cleaned it with water, ensured it was dry and then broke out the red paint. The question here is, how much do you apply? Do you apply a nice thick glossy coat or the bare minimum? I went for the thick glossy coat figuring that it is easier to take away than add later.

After closely examining my work, I touched up a few areas that where inconsistent and then stepped away. As always, I could see some small areas that I REALLY wanted to paint more but I disciplined myself after previous impatient attempts to call it quits for the day.

This second coat will now have the rest of the week to dry and after a trip out on the weekend the next step is to apply the clear coat.

Dry paint, dry.

Filler required

Now that I deemed the proof of concept repair to be enough of a success I decided it was time to start on the main event.
I therefore worked to tape up the location of the crack and then sand it back.
WP_20140609_002
I then used the paint from the paint repair kit and the result came up as you can see above. I was pretty impressed with how clean it looked. However, there was a problem. As you might be able to tell from the above picture the crack is still plainly evident (you should be able to click on the picture to enlarge for more detail).
What I really should have done immediately after sanding it back was to fill it, but I got impatient and rushed into painting it.
Another lesson learn then, so I went off to Bunnings Hardware to buy something to fill the crack.

In the end I settled on some Loctite 5 minute rapid repair epoxy resin (figuring it was a better option for fibreglass and the car than ‘bog’). I was going to go with the 60 second version but I thought I’d need to do some podding and poking of the adhesive so having 5 minutes instead of 60 seconds to do this was a good idea (which it turned out to be). Also, the 5 minute product has a higher strength rating. So that sealed the deal on which product to use.
I return to the car after about 7 hours and attempted to start sanding back again. Unfortunately, I discovered that the paint had not dried completely (probably because of the cold weather). If I touched it it left finger marks. Damm, didn’t figure on that now did I? What I should have done is leave well enough alone and let it dry further but no, impatience got the better of me and I started sanding again. Bad move. The sandpaper kept catching and the not so dry paint just clogged the paper. Again, I should have taken that as a hint but I continued (when will I learn?). It also probably didn’t help that I was using 1200 grit rather than 600.
I managed to sand back the left hand side of the crack (the larger gap) but gave up trying to the hairline crack to the right. I thought I’d give it at least another 24 hours to dry.
So I come back 24 hours later and commenced sanding again. The paint was still grippy but I persisted. It would have probably have been better to use the 600 grit rather then 1200 like I was since it would cut more but I was by now a little gun shy so I persisted with the 1200 grit until the crack had been sanded back along its length.
The whole area doesn’t look at good as when I sanded it before painting it so again, I should have filled it then rather than rushing to paint. Just need to chalk that up to another learning lesson and be more patient.
With the area now sanded as much as I could take using the 1200 grit (sanding is no good for my lack of patience), I activated the repair epoxy.
One repair item that I did discover when visiting someone during this period was a set of wood food skewers. They are much better than toothpicks. They are longer and have a pointed and blunt end. I swiped half a dozen of these to use in my repairs and I’m glad I did.
I put the nozzle on the epoxy and pushed the plunger. The idea was to use the end of the nozzle which is was fairly fine, directly onto the crack. Problem was, the nozzle was not fine enough and I would have ended up dripping the epoxy everywhere. Plan B. I therefore reverted pack to the cooking skewer which proved very successful. I scooped the epoxy from the nozzle onto the pointy end of the skewer and ‘painted’ it across the crack.
I touched up a few locations with some more epoxy and checked that I had covered everything. With the mixture on and around the nozzle hardening I decided it was time to walk away for the day (see I am learning ever so slowly as I REALLY did want to add more epoxy).
WP_20140610_004
The end result is the picture you see above with the adhesive covering all parts of the crack. I waited another 5 or so minutes for it to set and I packed up.
The question now is how long do I wait? The adhesive is supposed to take 24 hours to set completely but the temperature is much cooler than average so that means I’ll have to wait longer. That I can do. So let’s say I wait 48 hours and the adhesive is set. Do I sand it back and repaint immediately given that I will be taking the car out for weekend? 
Sure I’d like to get a first coat on it before I head out BUT given that it didn’t feel 100% dry after 48 hours, am I better off waiting until the car is parked after the weekend and then apply a first coat? That way I have a whole week to wait for it to dry? Or do I take something like a hairdryer to the paint?
Of course if I don’t apply the first coat and take the car out the untreated area will get dirty and need to be cleaned before the first coat.
Decisions, decisions. However, I can’t proceed forward until I see the state of the adhesive after say 48 hours. I’ll wait till then before deciding what course of action to take.

Proof of concept

To address the issue with the cracked bumper I did some research on the Internet and came across this site:

https://www.touchuppaints.com.au/

They basically sell a range of products designed to help repair basic bumps and scratches. Their site is a little hard to understand at first but basically their preference is for you buy their complete repair kit (BTKW37).

This seemed like a sensible enough idea, since although it was probably more stuff than I needed it would allow me to fix issues on some other cars. The cost was around AU$160 with shipping and insurance. The most important thing you have to do when ordering the kit is nominate your car colour. The site provides plenty of details on how to find that information as well as plenty of instructional videos. You then simply select your colour (my Rosso Corsa 300/12 was there) and order the kit based on that.

WP_20140607_005

The kit arrived very quickly and contained all the items you see above so it is pretty comprehensive.

WP_20140607_006

The main thing I needed for my proof of concept was the body paint but as you can see there is whole range of products here that can help you with scratches on plastic as well as paint, so therefore the kit looks like pretty good value for any repairs like this.

image

As I mentioned in the previous post, my starting point was going to be an attempt to repair the inside of the bumper near the muffler as shown above.

Part of the process would be involve sanding and this I wasn’t real sure about. So again, armed with some answers from the Internet I went out and bought some 1200 and 600 grit sandpaper. Basically, the higher the number the finer the grain and the less ‘cut’ it makes. My plan was to start with the 1200 grit and fall back to the 600 if needed.

Sanding the location proved quite challenging given the shape and the confines.

WP_20140607_009

After sanding the location back and then cleaning it off I was left with the small mark you see above.

The paint from the repair kit comes in a nail polish type bottle with a small brush attached to the cap to make it easy to apply. The main issue again was really access to the location to actually get in there and apply the paint.

I made sure that I also covered the exhaust so not to accidentally ‘repair’ what didn’t need repairing.

WP_20140607_012

I now left the paint to dry and when I looked again later you can see the result above. Obviously much better but I was disappointed that you can still see the crack. Clearly, more sanding and perhaps some filling is required. So, even though the crack felt smooth after sanding there was clearly still a ‘valley’ that perhaps rather than sanding should be filled and then sanded for the best results? Not exactly sure what product to use to fill this but that shouldn’t be hard to determine.

I tried retouching the crack directly using a toothpick to drip paint right into the crack but that didn’t prove very successful. I think that was because the pointed end of the toothpick wasn’t holding much paint. Upon later reflection, I thought that perhaps I should remove this point and simply have a circular end, which should hold more paint.

Part of the issue is also access to area to fully repair it so rather than get caught up in that I decided to step and judge the proof of concept a success. Firstly, I think the 1200 and 600 grit sandpaper will limit the amount of ‘damage’ I can do while still creating a smooth surface. The paint from the repair kit matches the car colour, which is a big plus. Finally, I now have some experience in the whole process so I feel ready to tackle the main scratch. I can always come back and redo this crack near the exhaust when I do the other part of the bumper.

The main crack will be much easier to access so I should be able to sand that back much better. I’ll need to tape off the area to limit any ‘boo-boos’. It will also require more sanding and perhaps also require some clear coat (again, comes with the paint repair kit) over the top?

I know that the repair isn’t going to be as smooth as the rest of the bumper and I am pondering the best way to remedy that. I’ll need to see what the end result is after my attempts before I decide but I think I might have to go over the affected area with some cutting polish to bring it all back to being level with the undamaged portion of the bumper.

Anyway, that is down the track. I’m happy that the proof of concept was a success, that I have all the items I need to complete the repair and that I have some experience now. Onto the main event now!

Colour confirmation

If you have been following along with this blog you’ll know that last week I managed to back the F355 into a road divider, mark and split the rear bumper (Damm!). You’ll find all the gruesome details here:

Look before reversing

WP_20140526_005

So my starting point is the above right after the fact.

WP_20140601_011

First step was to give the car a good wash and see if I could at least scrub off the black marks. As you can see from the above shot I was successful in doing that. So, this becomes the new starting point (and I feel a little bit better).

image

The next thing that I needed to confirm was the paint colour. You find the plate for this under the rear engine cover as shown above.

WP_20140601_001

As suspected, the car is Rosso Corsa Fer 300/12. Knowing this will allow me to order a bumper repair kit with the right colour.

So, the plan of attack is now do some research on fibre glass sanding and order a bumper repair kit. I’ll test the colour of the kit on a few scratches I have elsewhere that are inconspicuous. After that I’ll have a go at repairing the fibreglass inside the bumper next to the tailpipe.

image

That way I’ll be able to see whether I have the right technique without it being too obvious if I don’t.

So, off to learn about sanding fibreglass.